


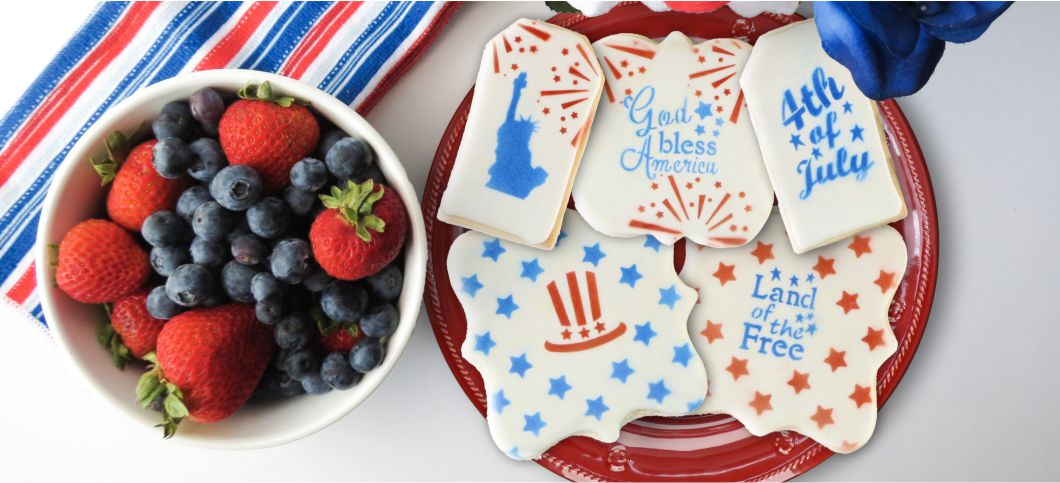
Get ready to unleash your inner flag-waver this Fourth of July with these cookie stencils from Confection Couture Stencils! Forget about fireworks 🎇; these cookies are about to light up the dessert table! With messages, designs, and stars, you’ll be showcasing your American pride one cookie at a time—because nothing screams "I love the USA" like a perfectly stenciled cookie. Just remember: if your cookies don't look like they belong in a 4th of July parade, just call it "abstract art" and hope people appreciate the creative freedom 🤩!
Don't forget to watch the video tutorial below for a visual guide on how to make these adorable cookies!
You Will Need:
Cookies:
- Sugar Cookies made using our tried and true sugar cookie recipe. Cut them using a variety of our 4th of July Cookie Cutters, or try the Plaque Style Cutters in different sizes and styles. Once cookies are cut, baked and completely cool, flood with white royal icing (get tips on flood consistency royal icing if you need help) and let that dry COMPLETELY.
Stencils:
-
Patriotic Stars Background Cookie Stencil if you want to mask off part of the stars to add one of the design elements in the below stencils, grab one of our blocker tools
-
Patriotic Cookie Stencil if you don't want to have to mask the items like the video shows, just purchase the 4-sheet stencil option
-
Patriotic Messages Cookie Stencil if you don't want to have to mask the items like the video shows, just purchase the 4-sheet stencil option
Tools:
-
Quadrant Masking Tool to use isolate elements (only if you get the 1-sheet option of the above stencils)
-
Stencil Genie Stencil Holder and Cookie Magnets to hold the stencils on top of the cookie, and keep it flush to prevent under spray. You may want to have a scribe tool, or a wooden skewer to hold some parts of the stencil flat while airbrushing.
- Air Genie Airbrush System
-
DecoPac Airbrush Food Coloring in Super Red and Navy Blue (or Electric Blue for something brighter).
Let's Get Started!
1. Airbrush the Stars:
- Start out by putting your star cookie stencil in the stencil genie.
- If you plan on adding the patriotic messages and designs in the middle of the stars, you need to place your blocker piece in the center of the stencil, and hold down with a magnet. When you airbrush the stars that blocked area will stay empty!
- Put your airbrush colorant into the Airbrush and test out the rate of flow on a piece of paper towel, moving straight to the cookie from the paper towel.
- Using a steady pressure, lightly airbrush the stencil design onto your cookie in an overlapping back and forth motion. Use your scribe tool or wooden skewer to help hold the stencil down while airbrushing.
- Once the design is stenciled, lift the Stencil off the cookie surface.

2. Add the Messages and Designs in the center of the stars:
- If you are using the 1-sheet options, you may want to use the masking or isolation tools to isolate images from the other three designs on the sheet. Again, omit these steps if you purchased the multi-sheet option!
- Place the stencils in the Genie, along with the masking tools, then place on cookie and weigh down with magnets. Airbrush as you did with the stars.
NOTE:
If you are using multiple colors on your cookies, you will need to clean the gun. To do this, flush it out using water or grain alcohol. To ensure you clean the compressor fully, run the airbrush, holding down the trigger over paper towels until it runs clear.


Feel Free to stencil the messages on their own on other cookies too! We have used the messages on star shaped cookies and loved the results!