Make your next trip or endeavor even more amazing with these Adventure Awaits Cookie Stencils from Confection Couture!
What can you I use to stencil cookies?
Whether it’s airbrushing or using royal icing, Confection Couture has everything you need to stencil the perfectly beautiful and whimsical cookie! This includes an incredible selection of stencil designs for all occasions, airbrush systems, colorants, and accessories.
What kind of icing do you use for cookie stencils?
Royal Icing works best for either coloring and creating the stencil itself or for creating a perfect surface onto which to airbrush your stenciled design.
Can you airbrush cookies?
It’s easy to create beautiful designs on cookies or cakes using our incredible selection of stencils and accessories!
What do you need to airbrush cookies?
Confection Couture has everything you need to create whimsical designs on your cookies or cakes for any occasion!
What is the easiest way to decorate cookies?
Using stencils, in conjunction with either airbrushing or royal icing, is a super easy way to create exciting themed cookies for any holiday or celebration or just for the fun of it!
Here's what you'll need:

- Adventure Awaits 2 Piece Cookie Stencil Set
- 1.5" x 3" Rectangle Cookie Cutter
- 3" Square Cookie Cutter
- AirGenie Airbrush System
- Gyro-Cut Craft and Hobby Cutting Tool
- Cookie Magnets
- Plastic Bottle with Dropper Tip
- Quadrant Masking Tool (x2)
- Stencil Genie
- Screen Genie
- DecoPac Airbrush Food Coloring
- Lime Green
- Honey
- Harvest Brown
- Navy Blue
- Midnight Black
- Bronze Shimmer
- White
- Sugar Cookie ingredients
- Royal Icing ingredients
- Glad Press'n Seal
- Paper Towels
Getting Started
The first step, of course, is to bake and ice your cookies.
Mixing Colors


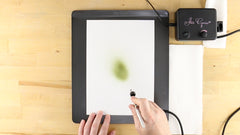
To achieve the drab green color, I mixed Lime Green, Harvest Brown, and White in roughly equal parts using a plastic dropper bottle. Test out the mixture using the AirGenie airbrush tool and a white sheet of paper. Adjust the ratio as needed.
Preparing to Stencil


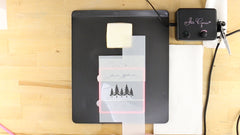


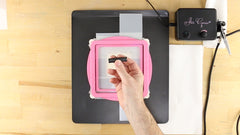


Next, take the trees stencil and place it over the thicker half of the Stencil Genie (with the magnets facing up). Use two Quadrant Masking Tools to protect the areas of the stencil above and below the trees design.
Place the Screen Genie overtop of the assembly and lock everything together using the remaining portion of the Stencil Genie. Next, use cookie magnets, in stacks of three or four, to further help press the stencil flat against the cookie's surface.
Always test out the amount of spray on a paper towel prior to airbrushing each cookie and each color. Apply the color in light, even coats using small, circular motions of the airbrush tool.
Once finished, lift away the magnets, then the rest of the assembly, and place the cookie aside for later.
Masking


For the "Adventure Awaits" stencil, use a piece of Glad Press'n Seal to mask off the arrow element. Cut a piece of plastic the size of the stencil, lay it over top, and press it firmly all around to remove any bubbles or wrinkles. Use the Gyro-Cut craft and hobby cutting tool to trim the excess material around the edge of the stencil.
Now, cut around the arrow element, turn the blade sideways and use it to lift the corner of the trimmed piece, and peel it away to reveal the design.
Finishing the Green Elements
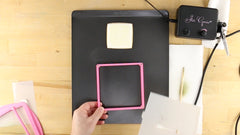


The rest of the stenciling process is the same as you did above for the trees cookie. Stencil the arrow using the same green color.
Cleaning the Tools


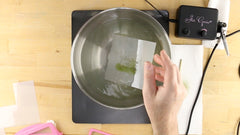


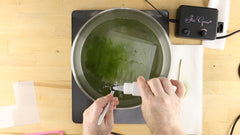
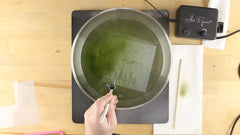


To clean the stencils, masking tools, and Stencil Genie between colors, remove any Press'n Seal and rinse them in water. For the Screen Genie, you can either rinse it under running water or spray water backwards through the stencil.
To clean the airbrush tool between colors, rinse out the reservoir three to four times with clean water. Next, reattach the hose, fill the reservoir, and run water through the tool until empty. Repeat once more with water and then again, this time using an inexpensive 100 proof vodka.
Dry everything completely using either paper towels or a lint-free dish towel.
Golden Yellow Elements


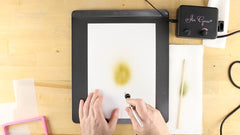
To achieve the golden yellow color of the sun and moon, try mixing some Bronze Shimmer, Honey, and Harvest Brown. Test the color and adjust the ratio as needed.


Use the Press'n Seal to mask the sun element prior to airbrushing it onto the rectangle cookie.


If desired, you can leave the Press'n Seal on the stencil and trim around the moon element. Just be sure to use the Quadrant Masking Tool to protect the cookie underneath the sun element of the stencil.


On the "Adventure Awaits" stencil, mask around the rays of light and airbrush them using the same golden color mixture.
Dark Blue Elements


Next add a few drops of Midnight Black to a couple squirts of Navy Blue to achieve the dark blue for the remaining elements.


Mask off and airbrush the mountain elements onto the rectangle cookie.

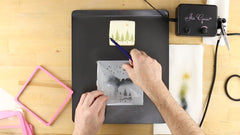


Next, trim around the moon element and remove the rest of the Press'n Seal, leaving the moon covered. Using the Quadrant Masking Tools, isolate the stars and airbrush them using blue colorant mixture.


Lastly, mask off the "Adventure Awaits" text and stencil them in dark blue.
Your cookies are now complete and ready to ride along on your next adventure!


