Celebrate the bravest among us with these Military Appreciation Cookie Stencils and Matching Cutters from Confection Couture!
Here's what you'll need:

- Semper Fi Cookie Stencil Set
- Aim High Air Force Cookie Stencil Set
- U.S. Navy Cookie Stencil Set
- Army Camo 2 Overlay Background Cookie Stencil
- Coast Guard Logo Cookie Stencil
- Semper Paratus Cookie Stencil
- AirGenie Airbrush System
- Cookie Cutters
- 4" Square
- 2" Square
- 3" Circle
- Gyro-Cut Craft and Hobby Cutting Tool
- Cookie Magnets
- Plastic Bottle with Dropper Tip
- Quadrant Masking Tool (x2)
- Stencil Genie
- Screen Genie
- DecoPac Airbrush Food Coloring
- Navy Blue
- Honey
- White
- Super Red
- Midnight Black
- Harvest Brown
- Sugar Cookie ingredients
- Royal Icing ingredients
- Glad Press'n Seal
- Paper Towels
Baking
The first step, of course, is to bake and ice all the cookies that you will need!
Harvest Brown
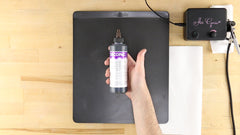


Load some Harvest Brown DecoPac Airbrush Food Coloring into the reservoir of your AirGenie airbrush tool and test out the color on a piece of white paper. If you're looking for a different shade, try mixing colors in a dropper bottle before reloading your airbrush tool.
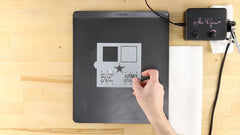




For stenciling designs that require no masking, such as the "ARMY STRONG" text, first separate the two portions of the Stencil Genie and place the thicker (for thicker cookies) side down with the magnets facing up. Next, position the stencil with the design centered within the square.
Use two quadrant masking tools to surround the design and protect the rest of the cookie from overspray. Now, place the Screen Genie over the stencil and masking tools and lock everything together with the remaining piece of the Stencil Genie.
Finally, place the entire assembly over the cookie, carefully lining up the design where you want it to go.


Always text out the spray flow on a paper towel prior to airbrushing each cookie and color. Adjust the flow if needed by turning the knob on top of the unit.
Use a chopstick of long needle to press down any areas of the stencil that are still tending to lift away from the cookie surface.

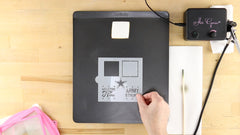


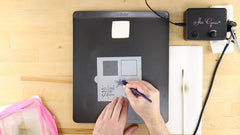


It's a good idea to wipe down both sides of your screen between each cookie. This prevents buildup of colorant which can lead to blotchiness.
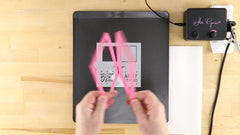
For more intricate stencil designs, cut a piece of Glad Press'n Seal and place it over the stencil. Next, take a Gyro-Cut craft and hobby cutting tool and cut around the edge of the stencil, allowing you to remove any excess plastic.
Now, use the Gyro cutter to trim around any design elements that you will want to mask - in this case everything except the star in the center. Turn the blade sideways and use it to lift a corner of the Press'n Seal and carefully it away leaving only the star uncovered.


The rest of the stenciling process is the same as above where you airbrushed the "ARMY STRONG" text.


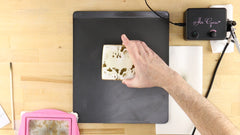
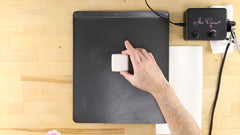
For the camouflage background stencil, use the Press'n Seal to mask off just the center border. Use the brown colorant to aim at the selected areas of the design, slightly overlapping with the patches that you will later airbrush in black.
Cleaning the Stencils and Tools


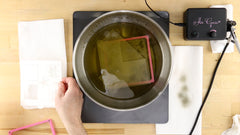

To clean the stencils and stencil tools, simply rinse them with water and dry completely using a paper towel or lint-free dish towel. For the Screen Genie, either run under a faucet or spray water backwards through the mesh using a chemical-free spray bottle. Dry completely as well.
Midnight Black


If you have a spare one, replace the airbrush tool now and load with Midnight Black. If not, clean the airbrush tool using the procedure outlined in other cookie tutorials.


Use the black colorant to airbrush the borders on the two small square cookies.


Next, mask off and airbrush the border around the star and the small stars on the other square army cookie.


Next, airbrush the border and remaining camouflage elements, again overlapping slightly with the brown elements.


Stencil the text "ARMY" inside the border of the large square cookie.


Apply the anchor and "USN" text to the 3" circle cookie and the "Semper fi" text to the corresponding cookie.


Next, mask off and airbrush the "USMC" text on the large Marines cookie. Place aside the airbrush tool loaded with black.
Super Red

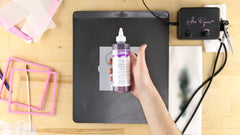


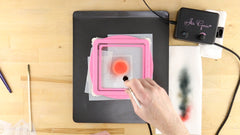

Switch to Super Red and airbrush the red background on the small circle cookie.


Switch back to black and airbrush the text on the small round cookie.


Next, airbrush the red elements of the Marine Corp emblem design.
Honey


Now, switch to Honey colorant and airbrush the yellow border around the text "NAVY".


Using the cookie as a guide, identify which and trim around the stars on the striped background stencil and airbrush them in yellow.


Now, mask off all of the yellow elements on the two-Navy design stencil.


Stencil the eagle's anchor and the rope around the anchor on the other cookie.
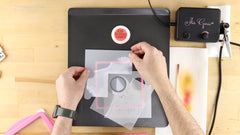


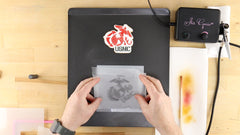


Next, mask off and airbrush the yellow border and yellow rope on the Marines cookies.
More Red


Next, mask off and airbrush the red elements of all three Air Force cookie.


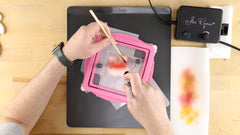


Now, mask off and stencil all of the red elements of the three-stencil Coast Guard designs.


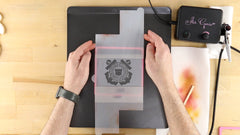
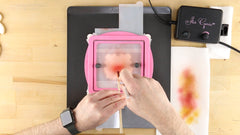

Next up is are the red elements of the largest Coast Guard cookie.


Complete the stripes of the rectangle cookie.
Navy Blue


Switch to Navy Blue to complete the "NAVY" text cookie.
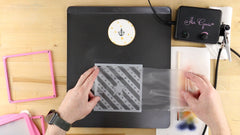


Using the Press'n Seal again, isolate the stripes and star on the Navy background stencil. Airbrush these elements in blue.


Next, mask off and stencil the blue elements of the smaller Navy cookies.


Next up is the eagle emblem cookie from the Air Force collection.


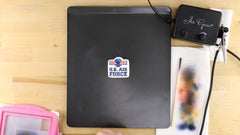


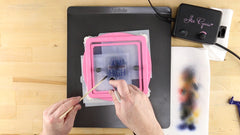
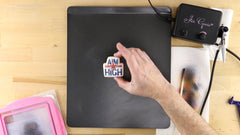
Next, isolate and airbrush the blue elements of the remaining Air Force cookies.
Mixing Colors


To achieve the muted blue of the Coast Guard cookie, try mixing a squirt of Navy Blue and a squirt of white in a dropper bottle. Mix thoroughly and be sure to test out the color on something white. Adjust the ratio of the colors as needed.


Now, mask off and airbrush the light blue elements of the two-design Coast Guard stencil.


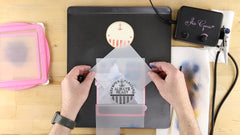


Finally, mask and airbrush the blue design elements of the last three Coast Guard cookies.


Your Military Appreciation cookies are complete and ready for the parade!!


1 comment
Good Afternoon,
My name is Megan, from B’Akira – I just noticed your website through your Entireweb Website Listing, and wanted to get in touch with you right away.
We have a special offer for your website today, and that is 1st Page Rankings in all major search engines (That’s Google, Yahoo and Bing) + social media and video commercial advertising starting at just $28.99 which I am ABSOLUTELY certain will benefit your website and business, by bringing you LOTS of new customers, very very quickly.
Visit www.AkiraServices.com if you want your website to be at the TOP of Google, Yahoo and Bing, AND we can get you started immediately. Or visit www.AkiraServices.com/11yearexclusive.html in the next 12 hours for a HUGE half price offer + your 2nd year free of charge.
I look forward to hearing back from you.
Cheers!
Megan
Executive Page One Relations
B’Akira Team