


It's Back-to-School Time! Turn cookie decorating into a fun 1st day activity for students and teachers with fun School PYO Cookies! 🍎
What You'll Need:
- Cookies (Use our Ultimate Sugar Cookie Recipe) baked and cut into the desired shapes using the cookie cutters that accomodate the PYO Stencils.
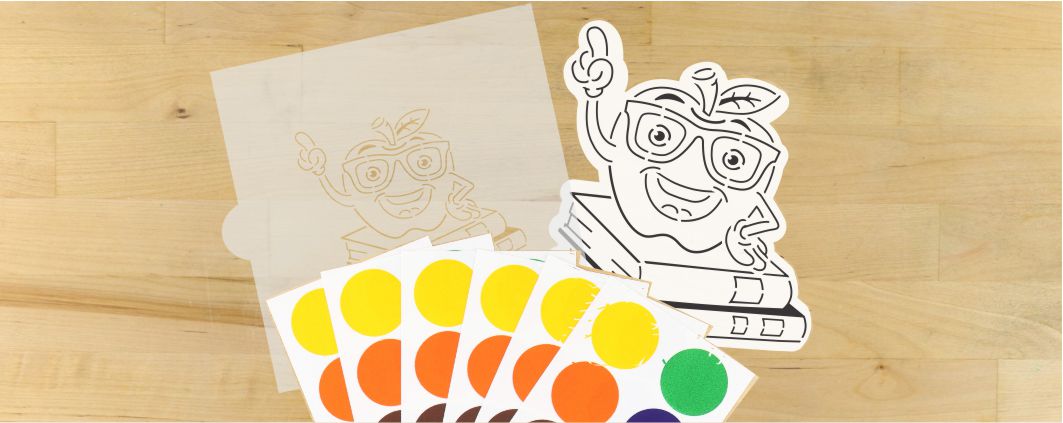
- Back to School PYO Cookie Stencils and their matching cookie cutters! Grab all of them for variety!
- Stencil Genie tool
- Stencil scrapers - either use the Icing Genie or our Cookie Stencil Scrapers or use a knife or offset spatula!
- Royal Icing using our Royal Icing Recipe. You will need white to flood the cookies first, then black to stencil the design onto the cookie.
- DecoPac Premium Gel food coloring in Black to tint the royal icing.
- Edible Paint Palettes or Edible Markers (bold tip) and Food-safe brushes to include with the cookies so that your customer, guests or trick-or-treaters can "color" or "paint" their cookies!
* You can airbrush the stencil onto flooded cookies as well! Just use your airbrush, and midnight black food colorant.
Instructions:
- Make your cookies and cut using the matching cookie cutters that came with your Back to School PYO Stencils.
- Bake them according to the recipe, cool them on a rack.
- Flood the cooled cookies with white royal icing – make this as flat and smooth as possible by using a thinner consistency and putting more icing down than you think you need. This smooth texture helps with the stenciling.
- Using the Stencil Genie tool, place the stencil over the cookie. The Stencil Genie attachment tool will hold the stencil firmly in place even when using a larger or taller cookie.
- Once the stencil is where you want it, use a small spatula to place some of the thick instant mix black icing onto the stencil. Apply more icing than you need and do so gently to prevent the stencil from bleeding onto the cookie. Start at the edges and work your way in.Top Tip: Don’t use too thin icing – this could bleed through.
- Using the scraper, gently remove the excess black icing until the design starts showing. Remove the stencil. This should have left a neat outline of the stencil on the cookie.
- Save any excess icing for the next cookie.
- Once the black icing sets, and is completely dry, you can package!
- When ready to package your PYO cookies, take a clear flat cookie bag, and insert the cookie, the palettes, markers and brushes you wish to use and tie with a orange and black ribbon!
Instructions on how to paint your "Paint Your Own" Cookies:
Palettes: Take food-safe brushes (or the ones included in your palette kit) and begin mixing the edible paint palette. These are edible watercolor paints, so for more vibrant colors, add less water. For a more transparent hue, add more water. Paint the images on the cookies and allow them to dry for about 2 hours.
Markers: Color in with light pressure so that the tip of the markers don’t get damaged. When using multiple colors at once, allow one color to dry completely so that the other color doesn’t bleed into it or stain the other marker tip.