


Get ready to turn your dessert table into a show-stopper this Thanksgiving! With the Leaf Garland Cookie Stencil Edger and Julia Usher’s Thanksgiving Place Cards Dynamic Duos Message Set, you’ll craft cookies that look like art but are totally achievable.
Let’s dive into how to make these festive cookies—and yes, you’re going to impress.

🎨 What You’ll Need
- Julia Usher's Thanksgiving Place Cards Dynamic Duos Message Set
- Madrid 2 Plaque cookie cutter
- AirGenie Airbrush System
- Gyro-Cut Craft and Hobby Cutting Tool
- Cookie Magnets
- Plastic Bottle with Dropper Tip
- Quadrant Masking Tool (x2)
- Stencil Genie
-
Screen Genie
- DecoPac Airbrush Food Coloring
- Midnight Black
- Super Red
- Firestone
- Honey
- Lime Green
- Harvest Brown
- Gold Shimmer
- Paper Towels
🧩 Step 1: Bake & Base Coat Your Cookies
Bake your cookies using your favorite sugar-cookie recipe—flat, clean surfaces are key. Once baked and cooled, add a nice coat of white royal icing to each cookie and allow them to dry completely.
🔧 Step 2: Set Up the Message Stencil
-
Grab one cookie and your Stencil Genie: separate the bottom (thicker) and top sections.
-
Place the plate so the thicker bottom sits down. Center the “THANKFUL” text stencil from the Dynamic Duos Message Set on top.
-
Use two Quadrant Masking Tools to mask left & right of the text—this protects the edges from overspray.
-
Place the Screen Genie over the stencil and secure it with the Stencil Genie top section.
💨 Step 3: Airbrush the Text
-
Shake your Midnight Black color, add 4-5 drops into the AirGenie reservoir.
-
Test the airflow on a stack of paper towels before diving in.
-
With small, circular motions, airbrush through the stencil. Don’t over-spray—too much = risk of bleeding.
-
Lift the stencil assembly carefully (always from the edge) to reveal your crisp text.
-
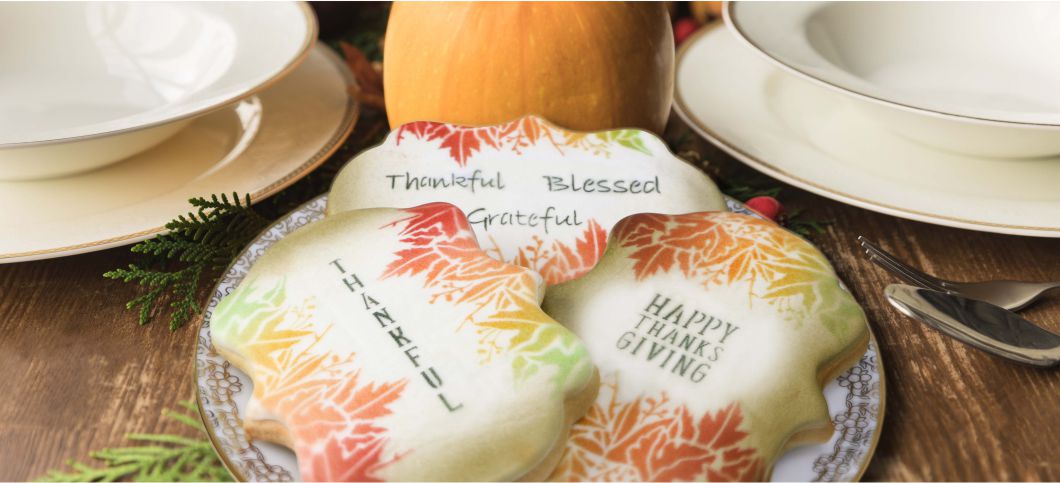
Repeat for “HAPPY THANKSGIVING” (use the 90° mask cut-out) and “Thankful Blessed Grateful” on additional cookies.
🍂 Step 4: Add the Leaf Garland Airbrush Design
-
Place the Leaf Garland Cookie Stencil Edger over half the Stencil Genie opening; mask the other half with the Quadrant Masking Tool.
-
Load Super Red, then airbrush the bottom of the leaves, fading as you move toward the center. Flip the cookie and repeat on the opposite side.
-
Next, switch to Firestone for rich orange tones—overlap with the red for that fall-gradient effect.
-
Then use Honey for golden yellow, and finish with Lime Green for that last pop of color.
-
Clean your stencil, Screen Genie, and tools between each cookie to keep colors sharp and prevent bleeding.
🧼 Step 5: Clean & Finish Strong
-
Dip stencils & masks in clean water, pat dry between uses.
-
When the Screen Genie color build-up starts, spray clean water through from the underside, dry both sides thoroughly.
-
Wipe your airbrush tool reservoir with water then run air through to clear any liquid—especially if switching colors.
-
When done, let your cookies fully dry before stacking or packaging.
✅ Wrap-Up
Thanks to this step-by-step process + the Leaf Garland Stencil Edger + Julia Usher’s Message Set, you’re all set to craft stunning, fall-themed cookies that steal the spotlight. These aren’t just treats—they’re conversation pieces.
Craving more ideas? Dive into our other tutorials and tag us to show off your cookie magic!
