


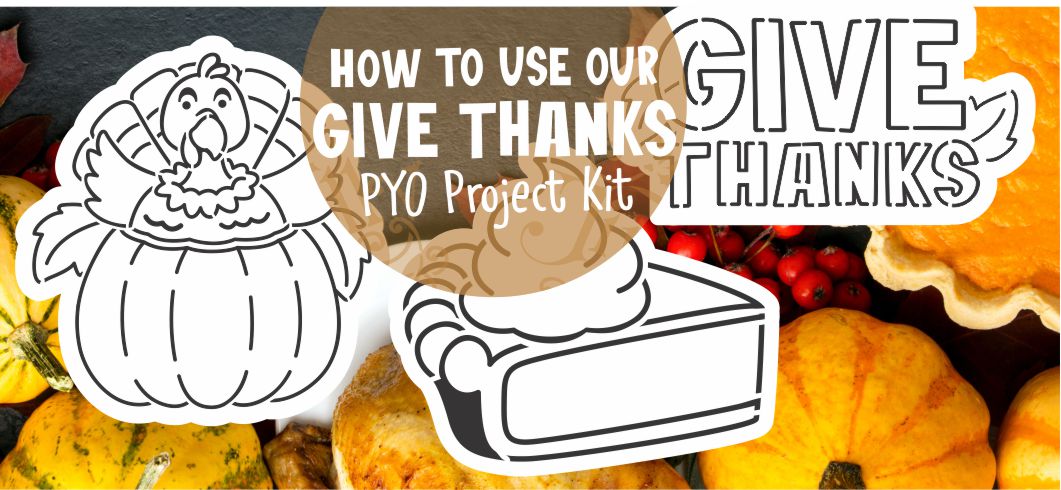
Get ready to make this Thanksgiving extra sweet—and colorful! With the Give Thanks Project Kit, you can transform plain cookies into festive works of art. Whether you're crafting with kids, treating your friends, or prepping treat-boxes for guests, this all-in-one kit makes decorating a breeze.

What’s You'll Need:
- Sugar Cookies cut using our Popular Sugar Cookie Recipe (using the cutters included in the Give Thanks Project Kit), baked and cooled.
- Flood Consistency Royal Icing (keep the icing white)
- Spreading Consistency royal icing for stenciling the outline
- 1 Give Thanks Cookie Decorating Project Kit which includes PYO stencils, cutters, dye to tint your outline icing and a scraper.
-
Stencil Genie Stencil Holder
- PYO paint pallets or edible markers for the kids to "color" their cookies.
- Clear bags to package your cookies (optional).
Step-by-Step: How to Use the Kit
1️⃣ Bake your cookies
Use the included cutter to make your shapes (turkey, pie, message plaque). Bake and cool completely. Flat, even surface = best results.
2️⃣ Base coat your cookie
Flood your cookies with a smooth layer of royal icing (or your preferred base). Let them dry fully—this sets the stage for painting and stenciling.
3️⃣ Set up your stencil
Align the stencil over your cooled cookie. Use the Stencil Genie stencil-holder to keep it steady. You’ll want to make sure the stencil is flat and snug for sharp details.
4️⃣ Stencil your designs
-
Using the scraping tool in the kit, apply icing onto the stencil. Spread a thin layer of icing over the stencil
-
Gently remove the excess black icing until the design shows. Make sure when
smoothing/scraping the icing off, you work in one fluid motion - in one direction. Making it almost level with the stencil itself.
5️⃣ Let it dry and finish
Allow cookies to set fully before packaging, stacking or serving. Have the kids use edible paint markers or food-safe paints and fill in the stencil outlines.Then watch the “wow” reactions.