


Add a breath of fresh air to your next gathering with these Spring Daffodils Cookie Stencils and Matching Cookie Cutters from Confection Couture!
In this tutorial, we are airbrushing the designs onto the cookies, but you can most certainly use this with royal icing as well!
Here's what you'll need:

- Spring Daffodils Cookie Stencil with Matching Cutter
- April Showers Message Cookie Stencil
- AirGenie Airbrush System
- 2" Square Shaped Cookie Cutter
- Gyro-Cut Craft and Hobby Cutting Tool
- Cookie Magnets
- Plastic Bottle with Dropper Tip
- Quadrant Masking Tool (x2)
- Stencil Genie
- Screen Genie
- DecoPac Airbrush Food Coloring
- Honey
- Tangerine
- Malibu Blue
- White
- Emerald Green
- Harvest Brown
- Midnight Black
- Sugar Cookie Ingredients: use our favorite Sugar Cookie Recipe
- Royal Icing in a flood consistency- use the Dream Meringue Powder for this (you can use our Royal Icing Guide for the perfect consistency you will need)
- Glad Press'n Seal
- Paper Towels
Let's Mix the Colors!


Airbrushing the Cookie Background:
- In a dropper bottle, add few drops of Malibu Blue to a drop of White and mix well.
- Next add a drop or two of Midnight Black to get a light, grayish-blue color.
- Load a few drops into the airbrush tool and test out the color on a sheet of white paper.
- Adjust the color ratio as needed.
- Now, airbrush the icing of each cookie, turning them frequently during the process. Apply the color in light coats by moving the airbrush tool in a small, circular motion.


Preparing to Stencil:


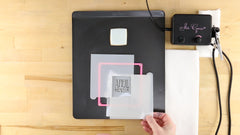


- Load some Midnight Black into a clean airbrush tool.
- Take the Stencil Genie and separate the the upper and lower portions.
- Place the thicker side down (for thicker cookies), magnets facing up and place the first stencil with the text "April Showers" centered in the middle of the square.
- Use two Quadrant Masking Tools to surround the design and protect the rest of the cookie from overspray.
- Now, place the Screen Genie over the top of the stencil tool and lock everything together using the upper portion of the Stencil Genie. Place the entire assembly over one of the square cookies.
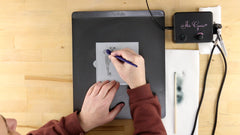
- Next, add some cookie magnets, in stacks of three or four to the edges of the stencil to help press it flat against the curved cookie surface.
- Additionally, while airbrushing, you can use a chopstick or long needle to add gently pressure to any areas of the stencil that are still tending to lift away from the cookie.
- Apply the color in light, even coats.
Airbrushing the Black Elements:


Repeat the above process to airbrush the text "Bring May Flowers" to the other square cookie.
Cleaning the Stencils and Tools


To clean the stencils and stencil tools, simply rinse them using clean water and dry them completely either with paper towels or a lint-free dish towel.
Stencil Masking


For masking off more intricate stencil elements, such as the flower petals, try using Glad Press'n Seal.
Cut off a piece roughly the size of the stencil and place it over the top, flattening it out to remove any bubble or wrinkles. Use the Gyro-Cut craft and hobby cutting tool to trim and remove excess plastic around the edge of the stencil.
Next, carefully trim around the flower petal elements. Turn the blade sideways and use it to lift a corner of of the trimmed Press'n Seal in order to peel it away.
Center the entire flower design in the square opening of the Stencil Genie.
Airbrushing the Yellow and Orange Elements


Add the Quadrant Masking Tools and the Screen Genie prior to loading some Honey colorant into the airbrush tool reservoir. Add the color, concentrating on the outer petals and less so on the flower centers.


Next, detach the airbrush tool with the honey color and place it aside. Resting it on the top of a large measuring cup works perfectly to help keep the tool upright and prevent the food coloring from spilling out.
Next, load some Tangerine in a clean airbrush tool (see other tutorials for instructions on how best to clean your airbrush tool between colorants). Spray the Tangerine onto the center of each flower, overlapping slightly with the honey color of the petals.


Repeat the above process to airbrush the flower heads on the other daffodil cookie.
Airbrushing the Green Elements


Next, remove the film from the stencil and replace it with a new piece. Trim around the stem elements of the flower designs, leaving the flower petals and roots covered. Load some Emerald Green and airbrush as you did before.


Repeat the above steps to airbrush the stems on the other daffodil cookie.
Finishing Up with the Brown Elements


For the bulb and roots of the second flower cookie, again use the process of masking with the Glad Press'n Seal before airbrushing.
Your Spring Daffodil cookies are now complete and ready to welcome the warm, sunny new season!
