


CM01
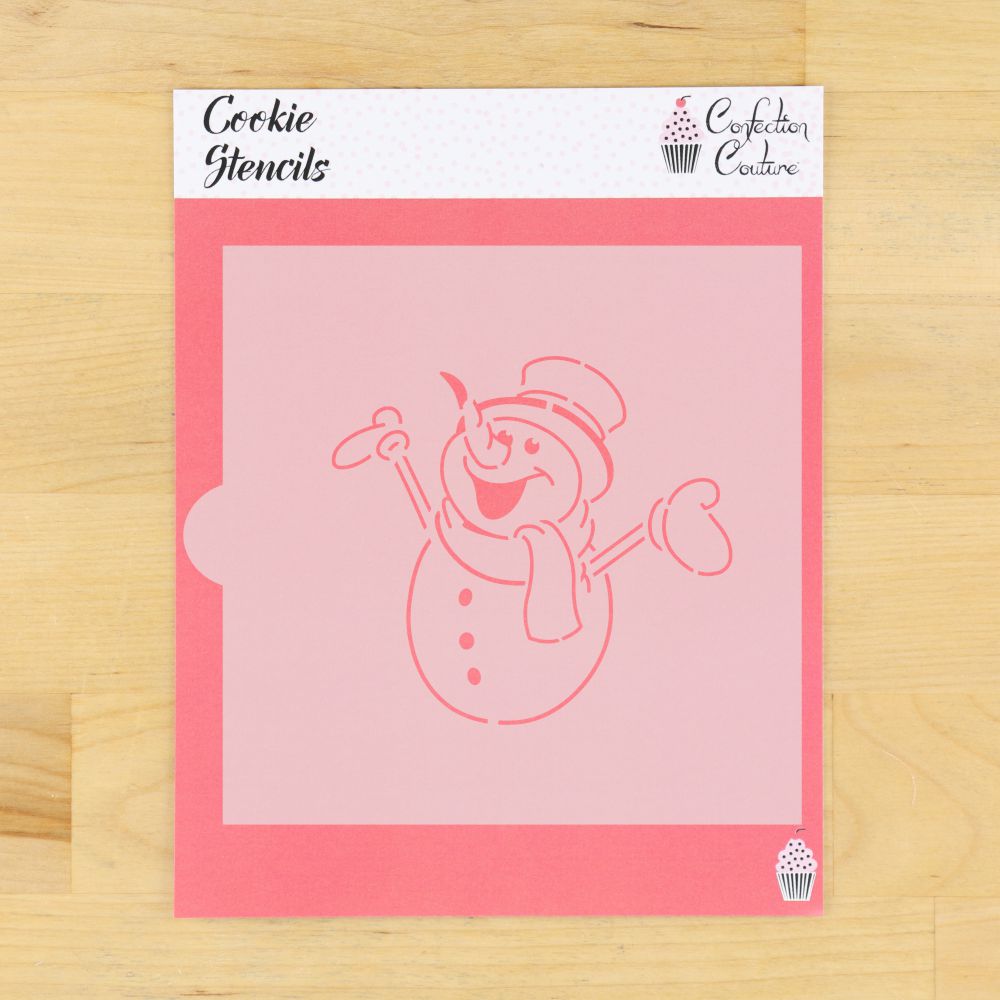
Snowman Paint Your Own Cookie Stencil
Snowman Paint Your Own Cookie Stencil
Couldn't load pickup availability
About this item
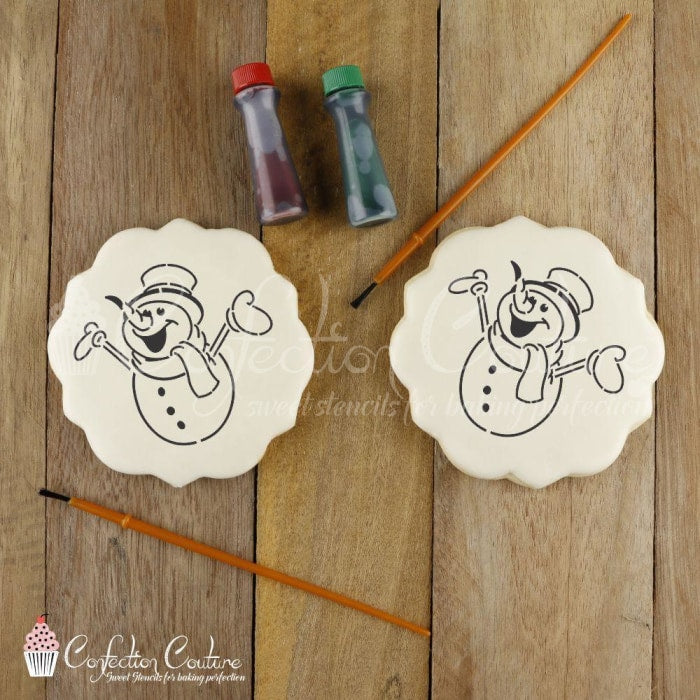
Get creative this holiday season with our Snowman 🎨 Paint Your Own Cookie Stencil and Cutter! Use it to design unique cookies for parties and stocking stuffers. Perfect for Christmas 🎅 celebrations and church events. Let's get baking!
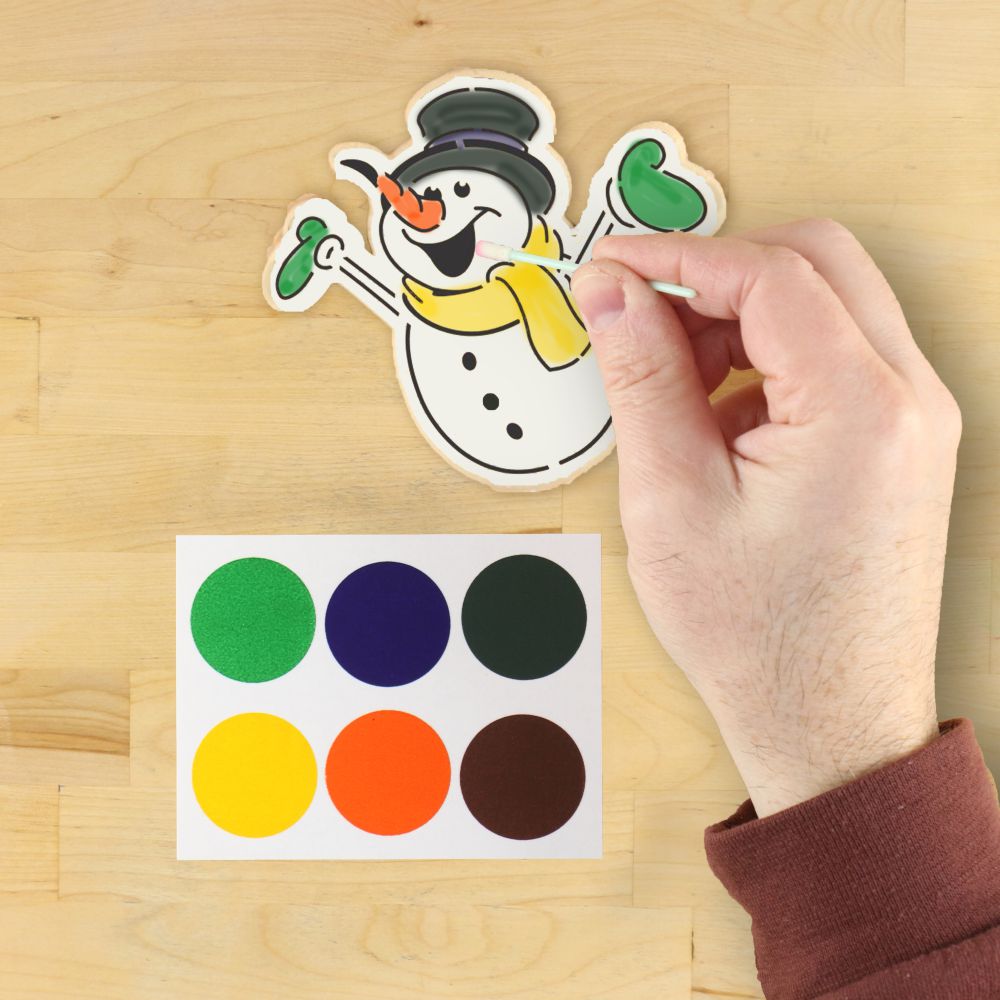
How to Use: If using to make PYO cookies, make sure to use edible PYO Paint Palettes for kids to use to paint their cookie, or have the kids fill in Satin Ice Food Color Markers. Tint royal icing with DecoPac Premium Gel Food Colorant in black and spread the icing with our own Cookie Stencil Scrapers.
For tips on how to make PYO cookies, visit our PYO Tips and Tutorials Page.
🍪 Cookie Stencil & Cutter Sizes:
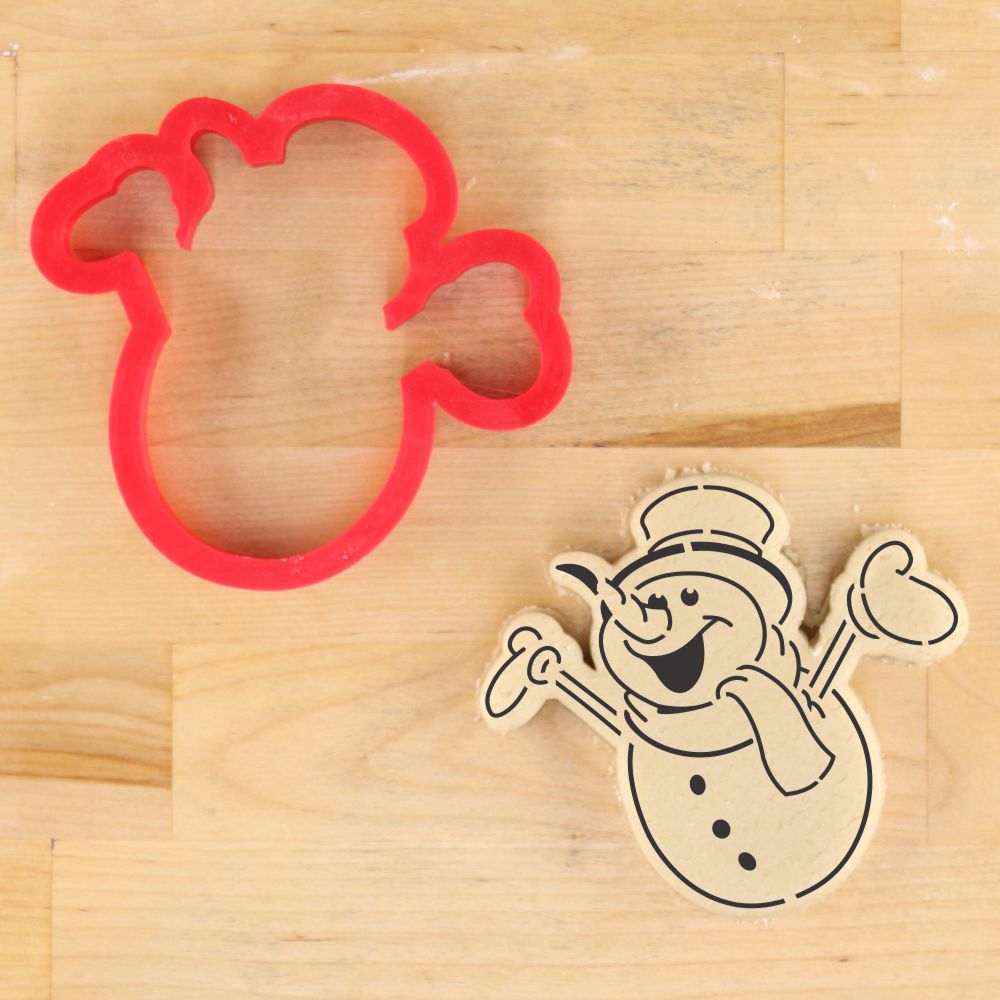
For best results use this design with its companion cookie cutter, otherwise, you will need a 4" cookie - make sure to measure your cutter against the artwork size below.
- Cutter Size: 4" w x 4 1/8" h (inner measurement)
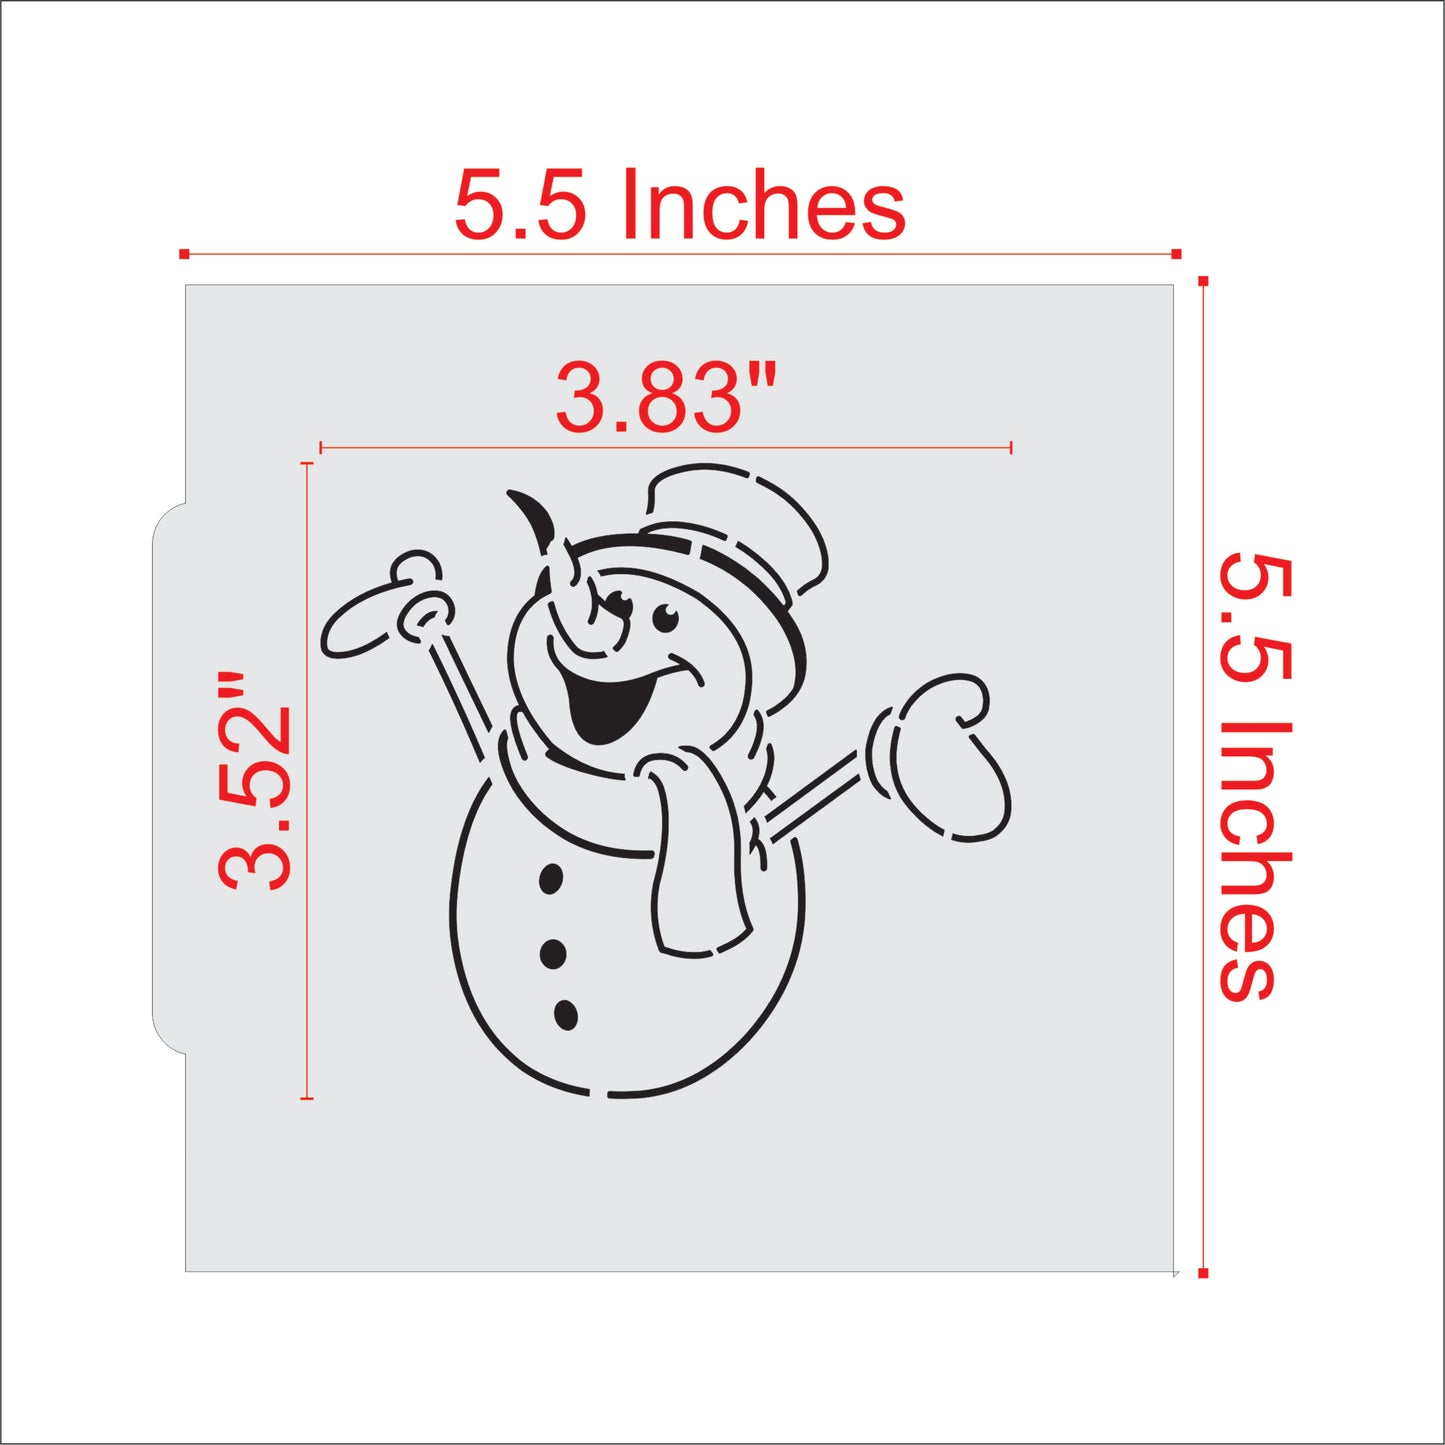
- Artwork Size - 3 1/2" high x 3 7/8" wide
- Stencil Sheet - 5 7/8" high x 5 1/2" wide and fits into a standard Stencil Genie

✨ Stencil & Cutter Highlights
Stencil Features:
-
Laser cut on 10 mil food-grade Mylar for professional precision
-
Ideal for both royal icing and airbrushing applications
-
Made in the USA
Cutter Features:
-
Created using state-of-the-art 3D printing technology
-
Reinforced sidewalls for strength, precision, and durability
-
Designed for clean, effortless cuts every time
🧼 Care Tips & Storage
-
Cleaning Your Stencil: Gently wash with warm, soapy water. Handle carefully to avoid tearing. Air dry flat.
-
Stencil Storage: Once dry, store flat in our Keep Safe Storage Album to protect from damage.
-
Cleaning Your Cutter: Hand wash only. Do not heat plastic.
🎨 Tips for Packaging Your PYO (Paint-Your-Own) Cookies
Make your PYO cookies look as amazing as they taste! Here’s a simple way to package them neatly and beautifully:
-
Prep Your Palette & Swab:
Place an edible paint palette and a PYO swab into a small lip and tape bag and seal it.
→ This prevents the paint from transferring onto your cookie. -
Bag the Cookie:
Slide your decorated PYO cookie into a flat, clear cookie bag — presentation matters! -
Add the Paint Set:
Tuck the sealed paint palette and swab bag behind the cookie inside the same bag.
→ This keeps the cookie visible — after all, you worked hard on it, so show it off! -
Finish with Style:
Tie the top with a festive ribbon or twine for a polished, gift-ready look. - Read our tips on mastering PYO cookies!
Now your cookies are ready to be displayed, gifted, or sold — clean, cute, and ready to paint! 🎁✨